Fragment Approach (Legacy)
The existing PetnowCameraFragment hosting approach and the 1.4.0 migration guide.
Legacy approach
PetnowCameraFragment is the existing (legacy) hosting approach. For new integrations, we recommend CameraView + CameraController. This document is provided for maintaining projects that already use the Fragment approach and for migrating to 1.4.0.
1.4.0 Changes (Migration)
In 1.4.0, the global initialization object PetnowUiClient was removed. The license and detection settings are now passed directly as Fragment arguments.
| Before (1.3.x and earlier) | 1.4.0 |
|---|---|
PetnowUiClient.initialize(apiKey, isDebugMode) (Application) | Fragment args ARG_API_KEY, ARG_IS_DEBUG_MODE (or override provideLicense()) |
PetnowUiClient.configureDetection(config) | Fragment args ARG_DETECTION_CONFIGURATION (Serializable) |
PetnowUiClient.isSuccessInitialize | Removed |
import io.petnow.ui.PetnowCameraDetectionListener | import io.petnow.callback.PetnowCameraDetectionListener |
PetnowCameraFragment uses the V1 listener (PetnowCameraDetectionListener — PetnowDetectionStatus / DetectionCaptureResult). Its types differ from the V2 listener (DetectionStatus / CameraResult) used by the CameraController approach.
Step 1: Create the Camera Fragment
Subclass PetnowCameraFragment and, in onCreate(), set the license, settings, and session ID as arguments before calling super.onCreate().
import android.os.Bundle
import android.content.Context
import io.petnow.ui.PetnowCameraFragment
import io.petnow.ui.config.DetectionConfiguration
import io.petnow.ui.config.DetectionPurpose
import io.petnow.ui.config.PetSpecies
import io.petnow.callback.PetnowCameraDetectionListener
import io.petnow.ui.DetectionCaptureResult
import io.petnow.ui.status.PetnowDetectionStatus
import java.util.UUID

class ClientCameraFragment : PetnowCameraFragment(), PetnowCameraDetectionListener {

    companion object {
        fun newInstance(captureSessionId: UUID) = ClientCameraFragment().apply {
            arguments = Bundle().apply {
                putString(ARG_CAPTURE_SESSION_ID, captureSessionId.toString())
            }
        }
    }

    override fun onCreate(savedInstanceState: Bundle?) {
        // Inject the license/detection settings as args before super.onCreate().
        arguments = Bundle(arguments ?: Bundle()).apply {
            putString(ARG_API_KEY, "YOUR_API_KEY")           // license
            putBoolean(ARG_IS_DEBUG_MODE, false)
            putSerializable(                                 // detection settings
                ARG_DETECTION_CONFIGURATION,
                DetectionConfiguration(
                    species = PetSpecies.DOG,
                    purpose = DetectionPurpose.PET_PROFILE_REGISTRATION,
                    enableFakeDetection = true,
                ),
            )
        }
        super.onCreate(savedInstanceState)
    }

    override fun provideCustomOverlayLayout(): Int? = null

    override fun onAttach(context: Context) {
        super.onAttach(context)
        setPetnowCameraDetectionListener(this)
    }

    override fun onDetectionStatus(primaryDetectionStatus: PetnowDetectionStatus) { /* Step 4 */ }
    override fun onDetectionProgress(progress: Int) { /* Step 4 */ }
    override fun onDetectionFinished(result: DetectionCaptureResult) { /* Step 3 */ }
}
Instead of arguments (ARG_API_KEY/ARG_IS_DEBUG_MODE), the license can also be provided by overriding provideLicense().
override fun provideLicense(): LicenseInfo =
    LicenseInfo(apiKey = "YOUR_API_KEY", isDebugMode = false)
Argument Keys
| Key | Type | Description |
|---|---|---|
ARG_CAPTURE_SESSION_ID | String | Capture session ID issued by the server (UUID string) |
ARG_API_KEY | String | License API key |
ARG_IS_DEBUG_MODE | Boolean | Debug mode (false recommended) |
ARG_DETECTION_CONFIGURATION | Serializable | DetectionConfiguration |
Step 2: Display the Camera Screen
val captureSessionId: UUID = // captureSessionId received from the server

val fragment = ClientCameraFragment.newInstance(captureSessionId)
supportFragmentManager.beginTransaction()
    .replace(R.id.fragment_container, fragment)
    .commit()
Once the Fragment is attached, it internally requests the camera permission, initializes the camera, and then starts detection. (Unlike the CameraView approach, the Fragment requests permissions automatically.)
Step 3: Handle Capture Results
override fun onDetectionFinished(result: DetectionCaptureResult) {
    when (result) {
        is DetectionCaptureResult.Success -> {
            // result.noseImageFiles: nose print images, result.faceImageFiles: face images
            uploadImages(result.noseImageFiles, result.faceImageFiles)
        }
        is DetectionCaptureResult.Fail -> {
            showRetryOrExitDialog()
        }
    }
}
The DetectionCaptureResult Type
sealed class DetectionCaptureResult {
    data class Success(
        val noseImageFiles: List<File>,
        val faceImageFiles: List<File>
    ) : DetectionCaptureResult()

    data object Fail : DetectionCaptureResult()
}
Server session management on failure
Even after receiving Fail, the server's capture session is still open. Retry (startDetectionSession()) or close the screen. If you close it, the server automatically ends (ABORTED) the session after about 5 minutes.
Step 4: Observe Progress and Status
override fun onDetectionProgress(progress: Int) {
progressBar.progress = progress // 0~100
}
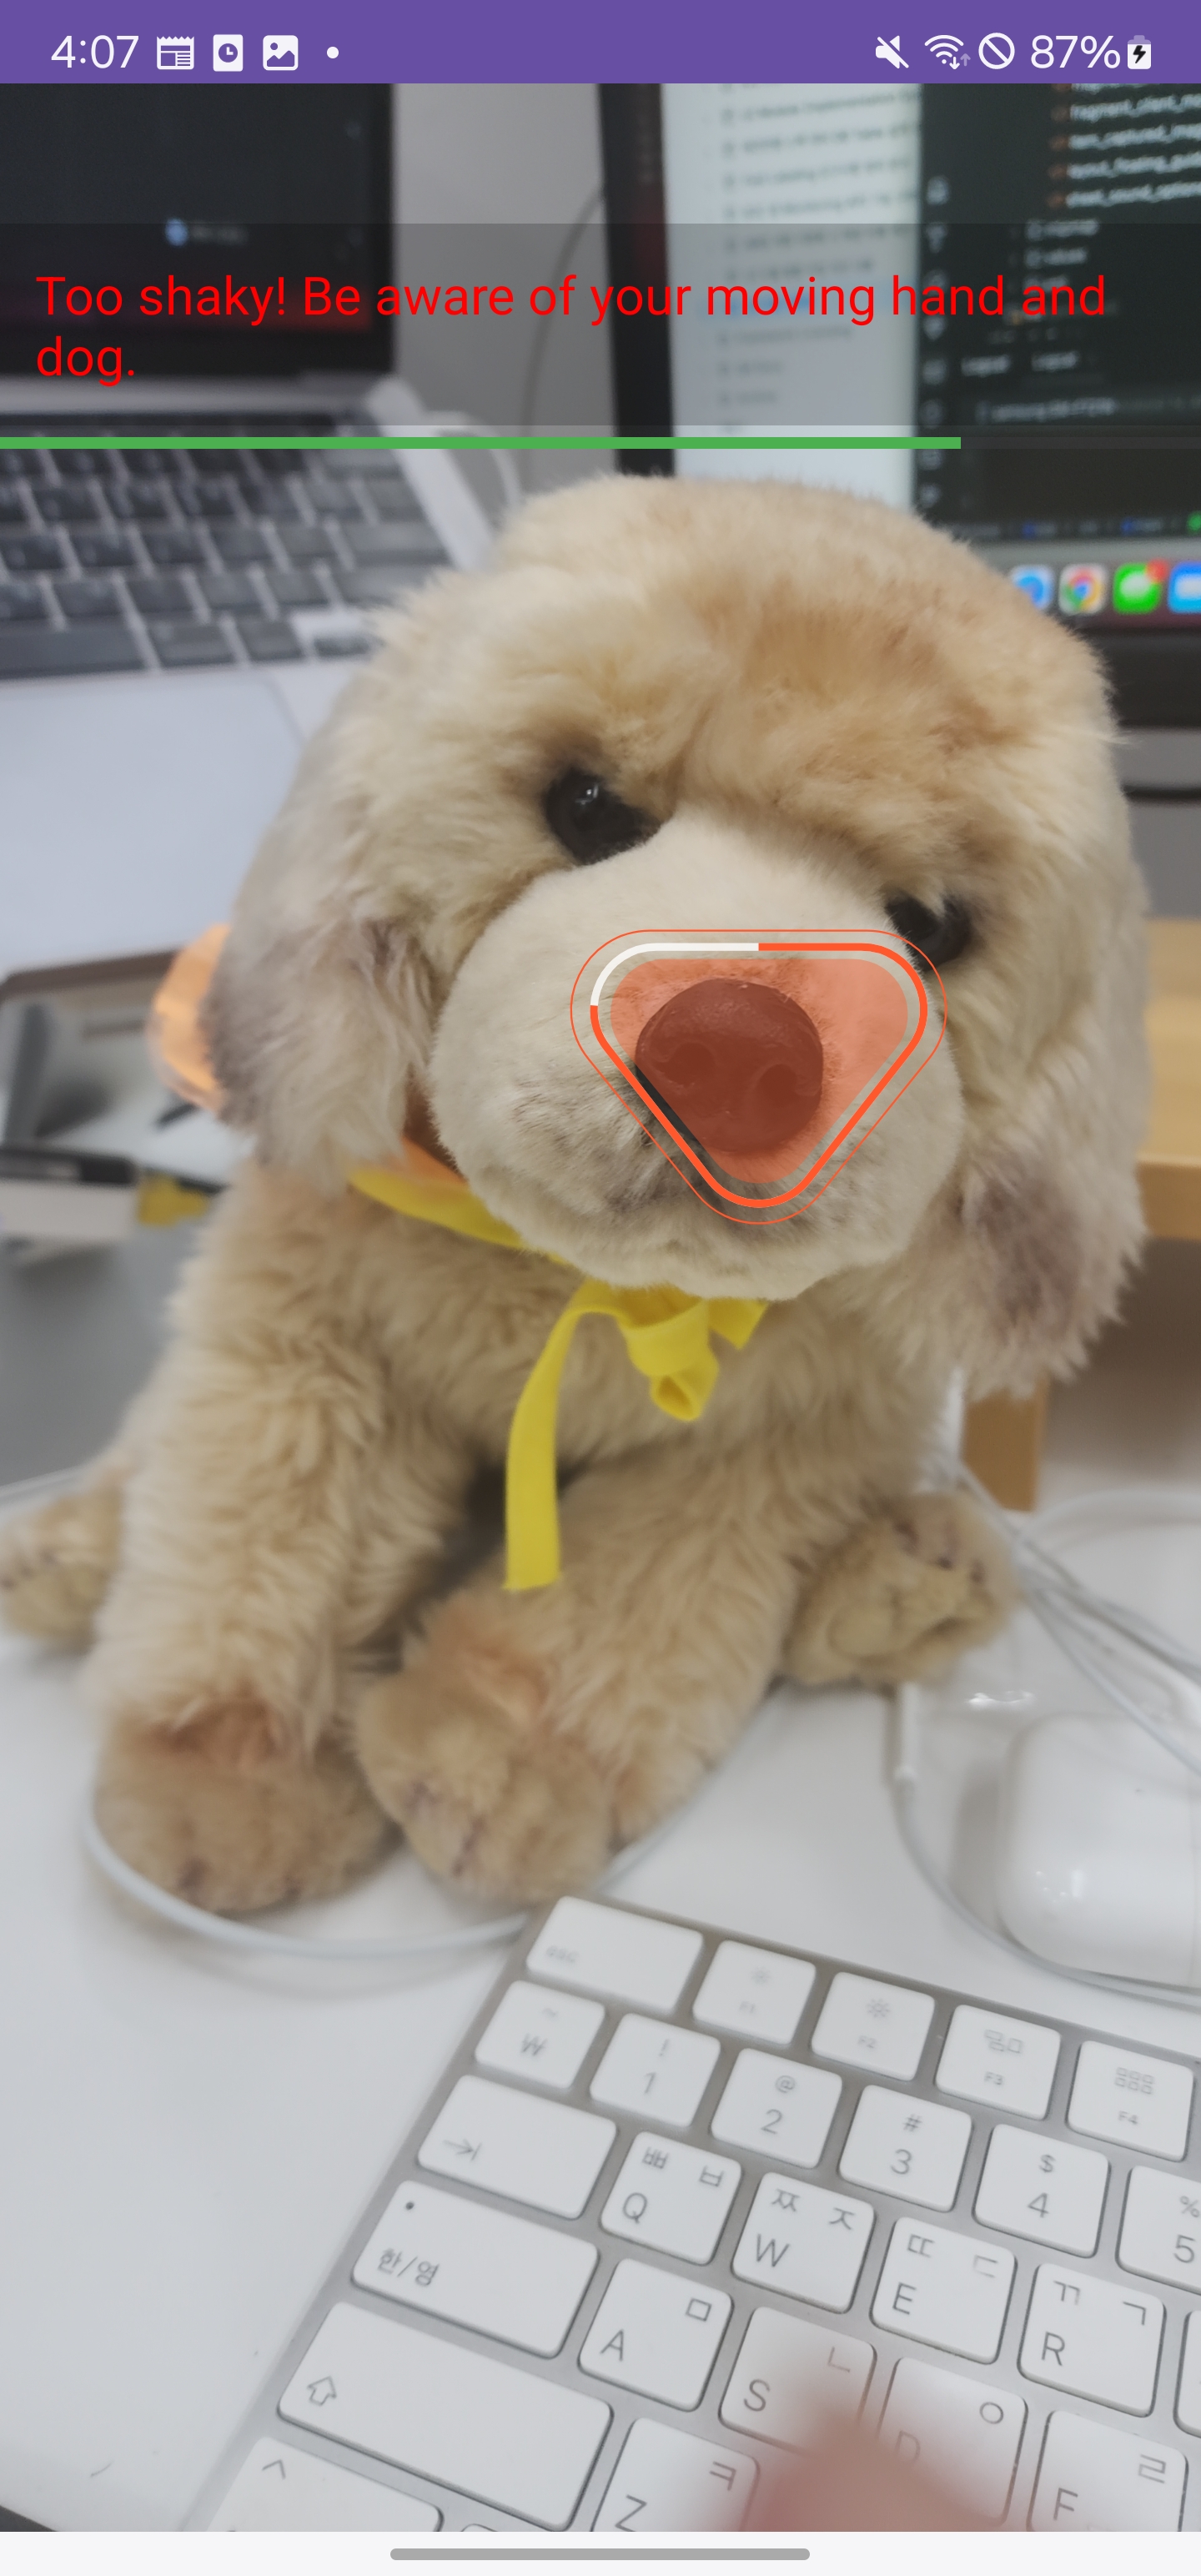
override fun onDetectionStatus(primaryDetectionStatus: PetnowDetectionStatus) {
statusTextView.text = when (primaryDetectionStatus) {
PetnowDetectionStatus.Detected -> "Detection succeeded"
PetnowDetectionStatus.NoObject -> "Fit your pet within the frame"
PetnowDetectionStatus.TooClose -> "Move a little farther away"
PetnowDetectionStatus.TooFarAway -> "Move a little closer"
PetnowDetectionStatus.TooDark -> "Move to a brighter spot"
else -> ""
}
}Detection Control
startDetectionSession()  // reset progress to 0 and start a new session (re-capture). Returns a Result
pauseDetection()         // pause detection (returns nothing)
resumeDetection()        // resume from where it was paused (returns nothing)
switchCamera()           // switch front/back (returns a Result)
In PetnowCameraFragment, resumeDetection() returns nothing (void). For re-capture (resetting progress), use startDetectionSession() and handle success/failure with the returned Result.
// Example: retrying after a capture failure
startDetectionSession()
    .onSuccess { /* restarted */ }
    .onFailure { e -> navigateBack() }
Permission Handling
The Fragment requests the camera permission automatically, but you still need to declare the permission in AndroidManifest.xml.
<uses-permission android:name="android.permission.CAMERA" />UI Customization
PetnowCameraFragment can inject a custom overlay and a floating guide on top of the default tracking UI.
Adding a Custom Overlay
Create an XML layout, inject it via provideCustomOverlayLayout(), and once inflation is complete, manipulate the views in onAddedCustomLayout(view).
class ClientCameraFragment : PetnowCameraFragment(), PetnowCameraDetectionListener {
    private var _binding: FragmentClientCameraBinding? = null
    private val binding get() = _binding!!

    override fun provideCustomOverlayLayout(): Int = R.layout.fragment_client_camera

    override fun onAddedCustomLayout(view: View) {
        super.onAddedCustomLayout(view)
        _binding = FragmentClientCameraBinding.bind(view) // bind the inflated view here
        binding.statusText.text = "Camera is ready"
    }

    override fun onDestroyView() {
        super.onDestroyView()
        _binding = null
    }

    override fun onDetectionProgress(progress: Int) {
        binding.detectionProgress.progress = progress
    }

    override fun onDetectionStatus(primaryDetectionStatus: PetnowDetectionStatus) {
        binding.statusText.text = when (primaryDetectionStatus) {
            PetnowDetectionStatus.Detected -> "Nose print scans are coming through!"
            PetnowDetectionStatus.TooClose -> "It's too close! Move back a bit."
            PetnowDetectionStatus.TooFarAway -> "It's too far! Move closer."
            PetnowDetectionStatus.TooDark -> "It's too dark! Try in a brighter place."
            else -> "Align your pet's face in the frame"
        }
    }
}| Method | Description |
|---|---|
provideCustomOverlayLayout(): Int? | Custom overlay layout resource ID (null if none) |
onAddedCustomLayout(view) | Called after the overlay is inflated — bind/manipulate views here |
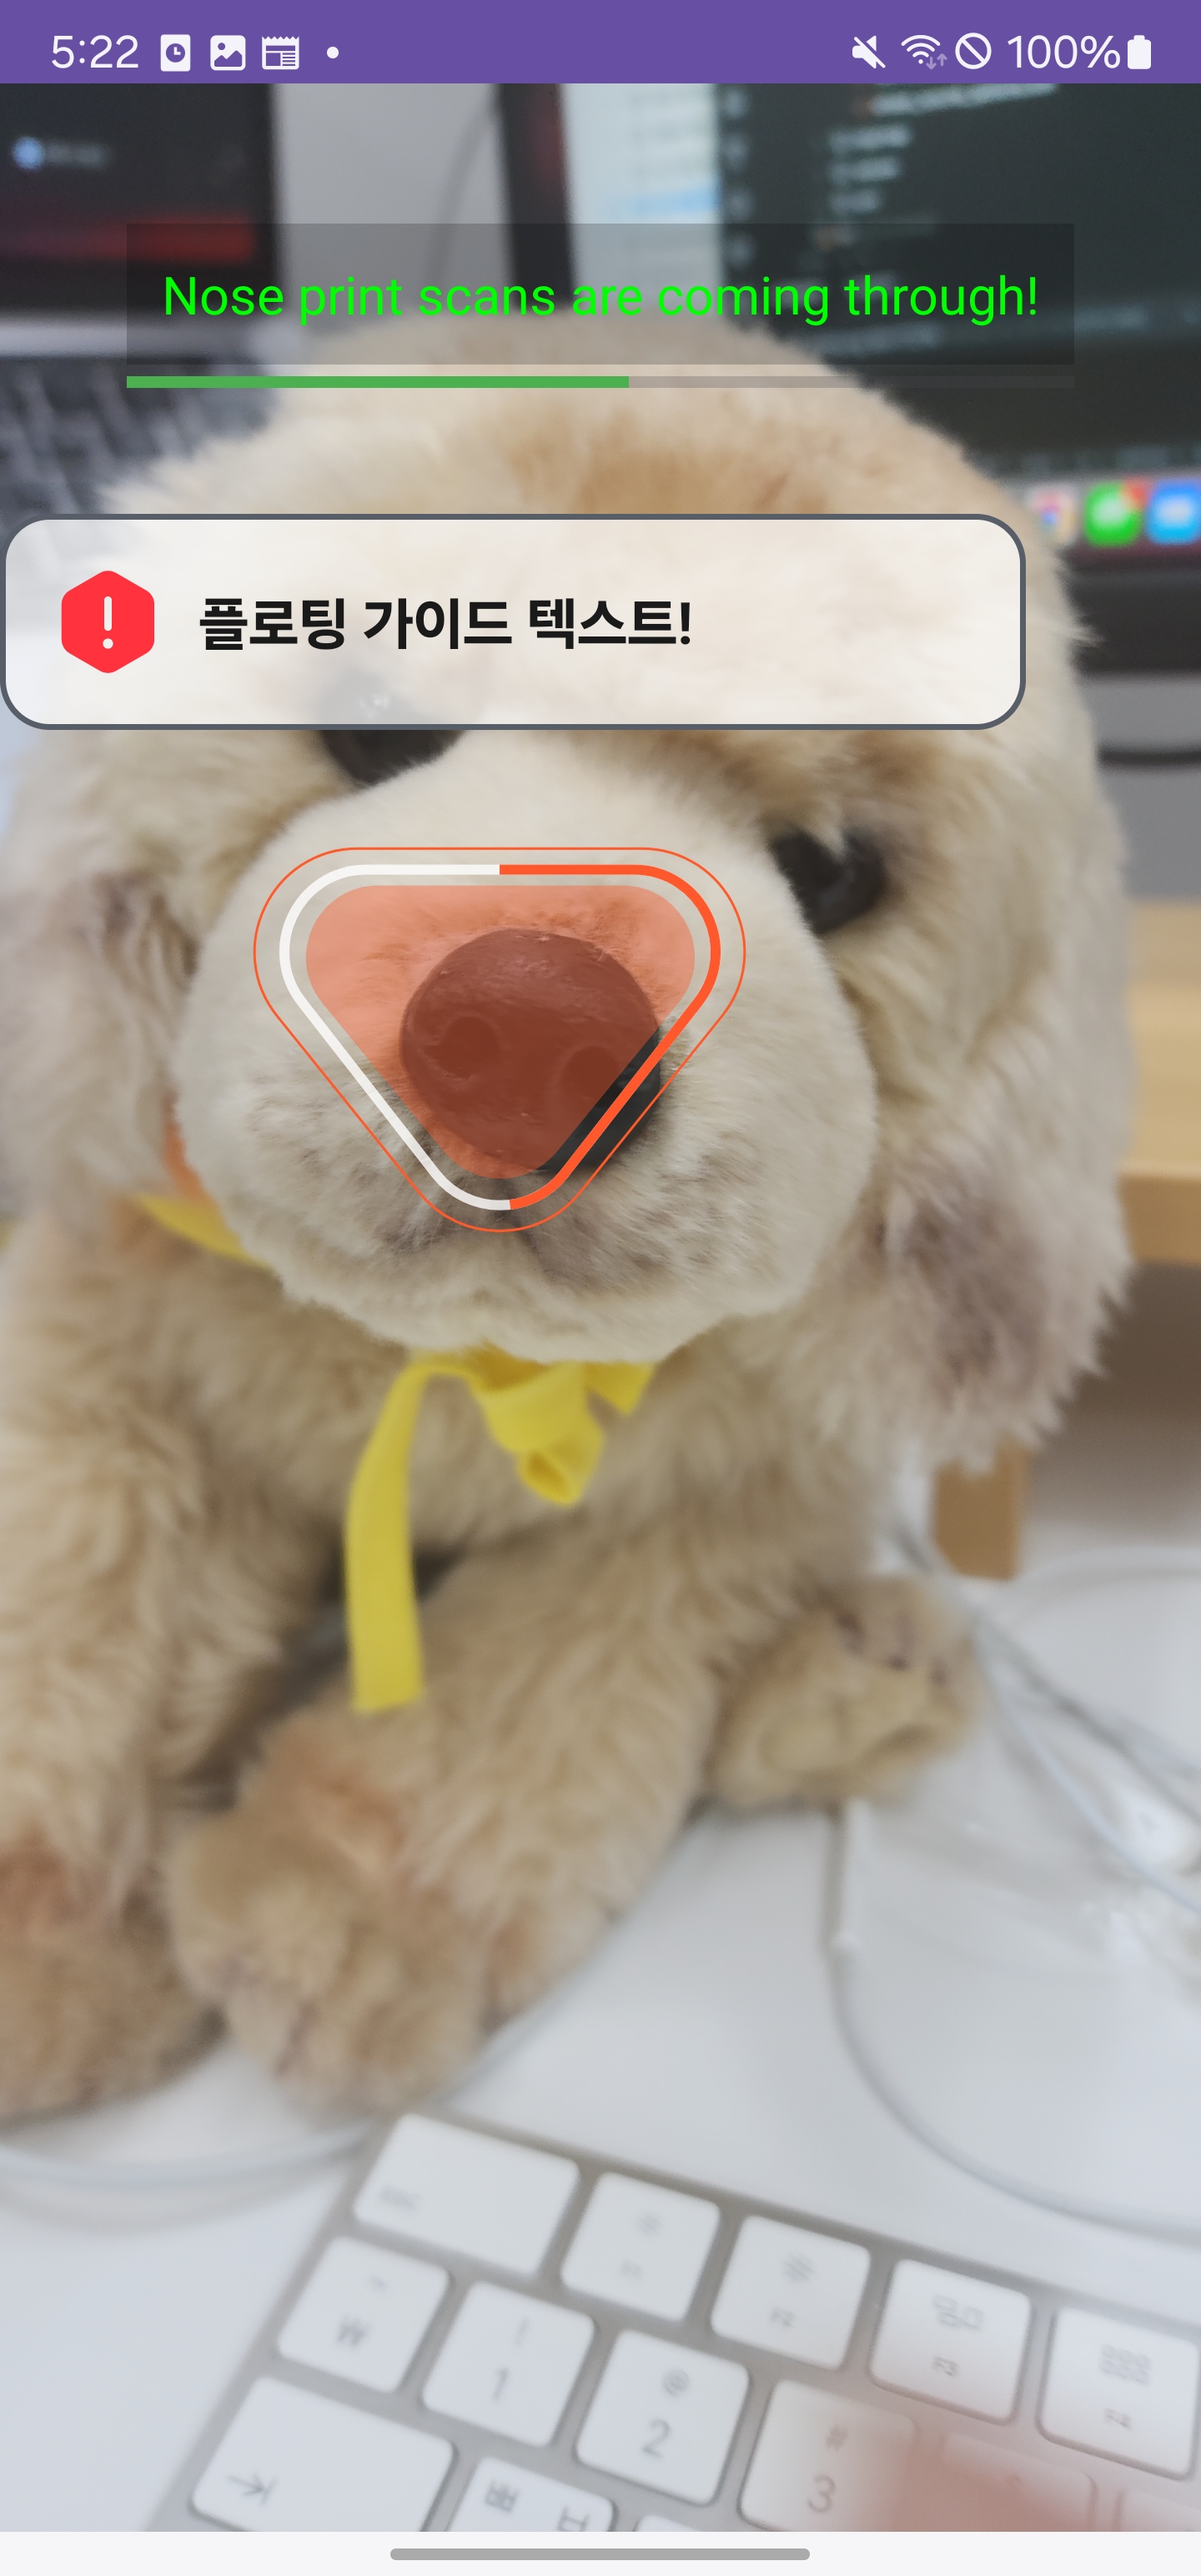
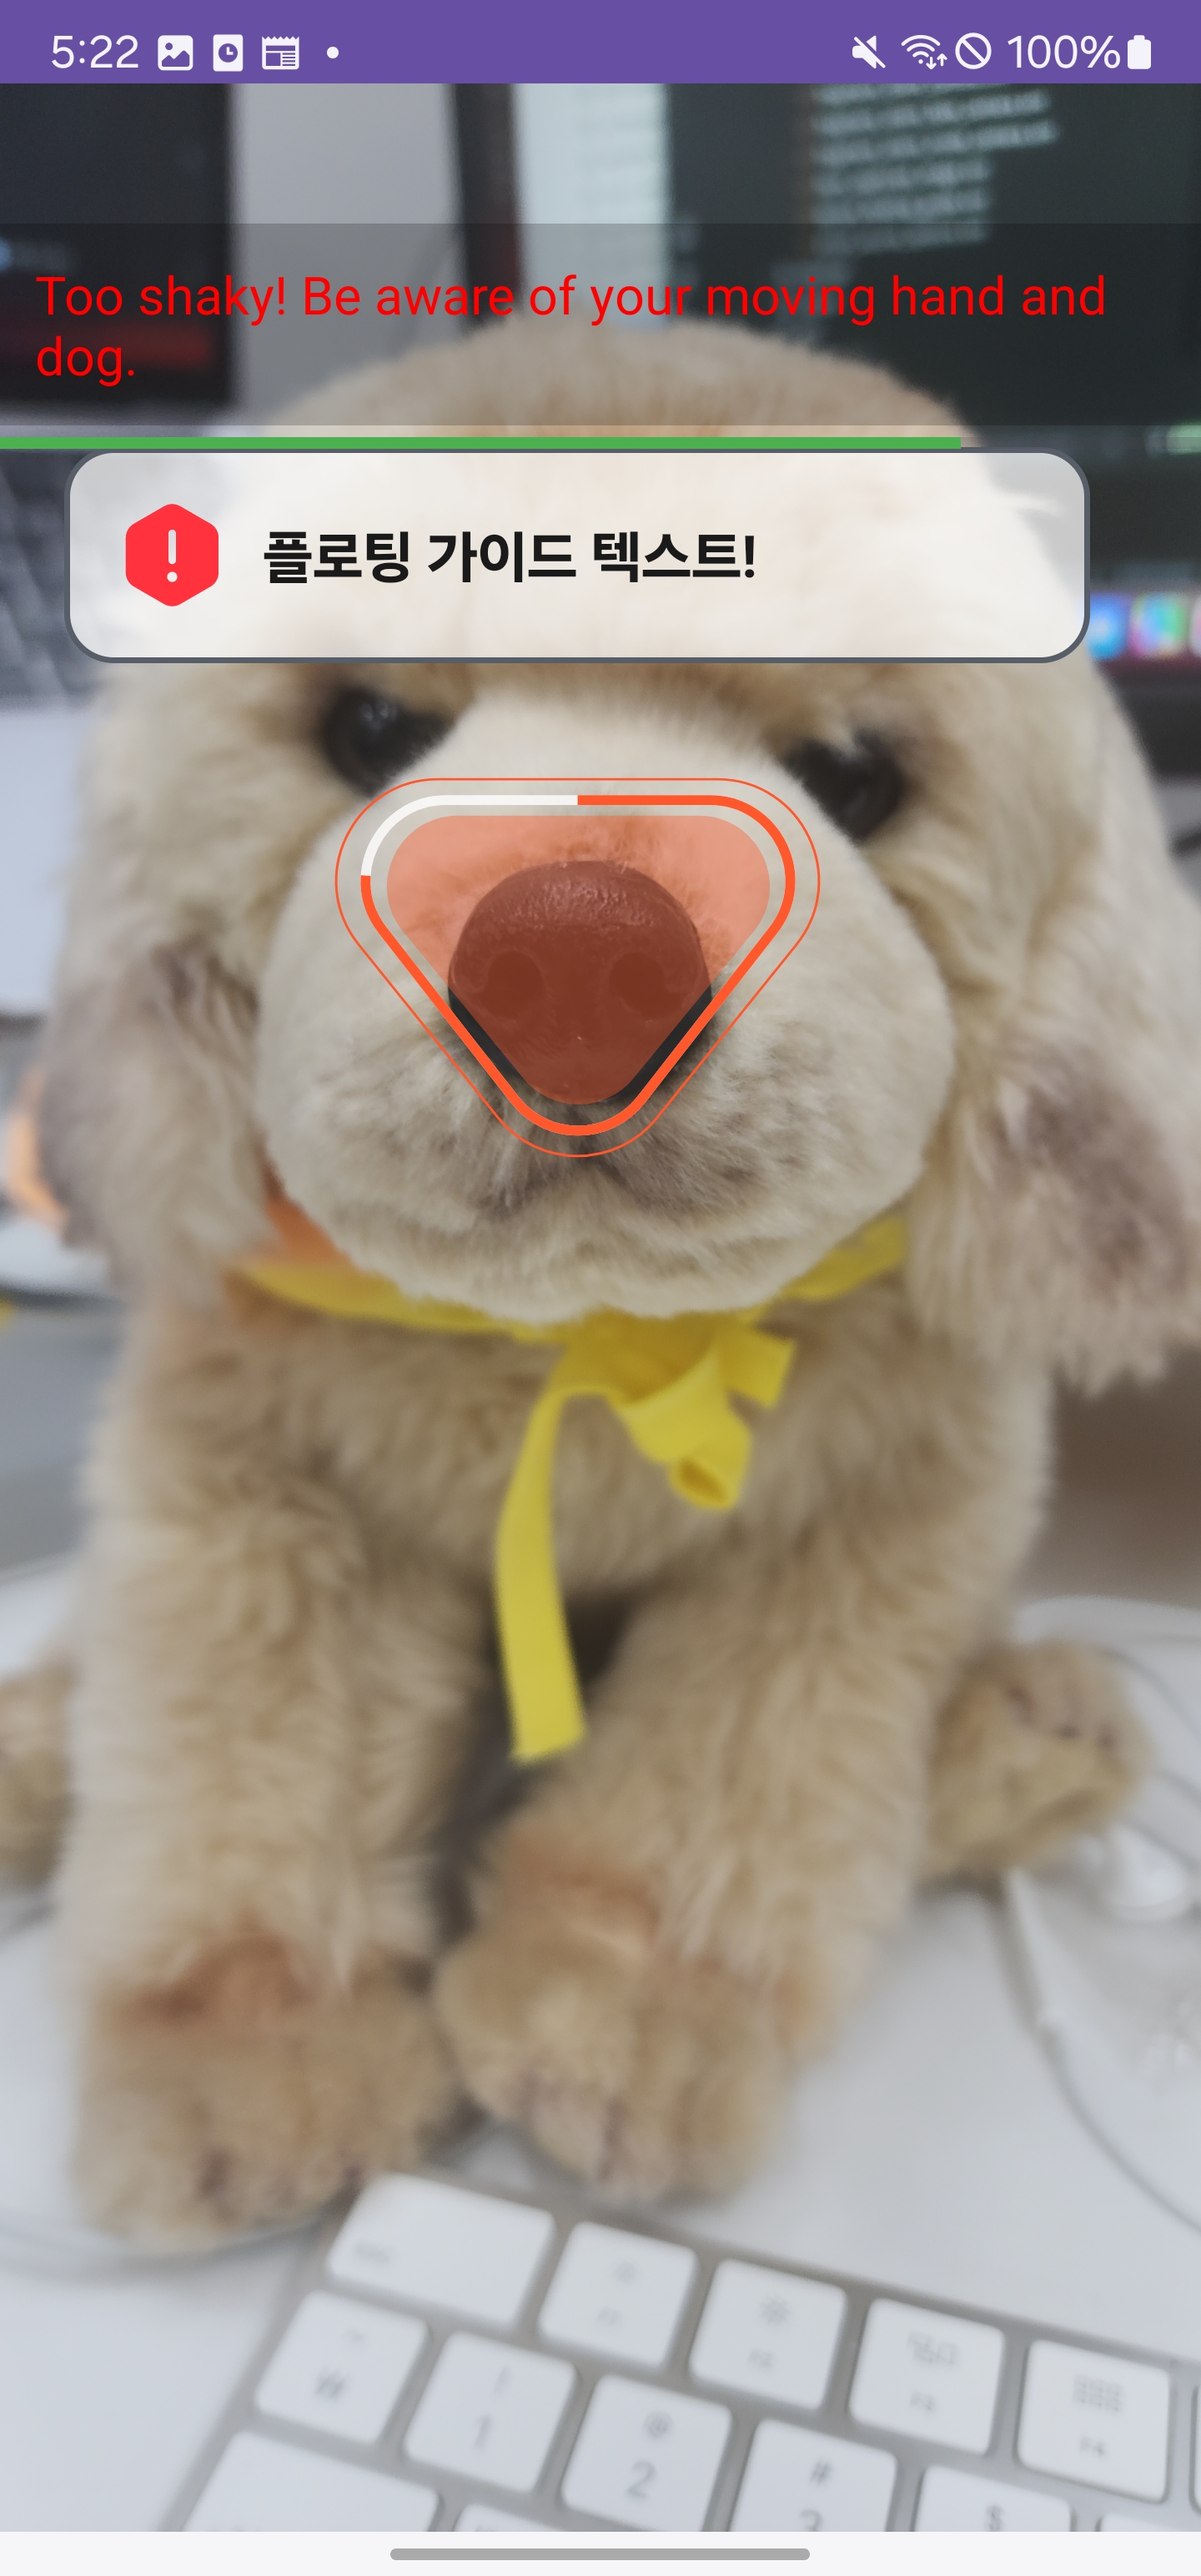
Floating Guide Over the Tracker
Inject a floating guide that follows the tracking UI. The module handles the coordinates and rendering automatically; the app only specifies which view to draw. (Optional)
class ClientCameraFragment : PetnowCameraFragment(), PetnowCameraDetectionListener {
    private var _floatingBinding: LayoutFloatingGuideBinding? = null

    override fun provideFloatingGuideLayout(): Int = R.layout.layout_floating_guide

    override fun onFloatingGuideAdded(view: View) {
        _floatingBinding = LayoutFloatingGuideBinding.bind(view)
        _floatingBinding?.layoutCameraGuideFloating?.isVisible = false // hidden because it's shown immediately on inflate
        _floatingBinding?.textCameraGuideFloatingMessage?.text = "Floating guide text!"
    }

    override fun onDetectionProgress(progress: Int) {
        if (progress > 0) {
            _floatingBinding?.layoutCameraGuideFloating?.isVisible = true
        }
    }
}| Method | Description |
|---|---|
provideFloatingGuideLayout(): Int? | Floating guide layout resource ID (null if none) |
onFloatingGuideAdded(view) | Called after the floating guide is inflated |
Next Steps
- Basic Usage - Migrate to the recommended approach (
CameraView+CameraController) - Fully Custom UI - When you need a 100% custom UI
- Sound Guide - Configuring sound playback