Basic Usage
UI Module usage guide.
Before You Begin
Before starting this guide, complete Getting Started. Calling PetnowApiClient.init() and configureDetectionMode() is required.
This guide provides step-by-step instructions on how to integrate pet nose print and face capture functionality into your app using PetnowCameraFragment, the core of the PetnowUI module.
Basic Usage
Implement PetnowCameraFragment and PetnowCameraDetectionListener to check Detection
UI Customization
Customize client-created UI on the Camera screen
Detection Settings
Check and use all Detection-related settings
1. PetnowCameraFragment Inheritance and Creation
This is the class responsible for all functionality in the UI module.
captureSessionId Required
PetnowCameraFragment must receive captureSessionId as arguments. Pass the captureSessionId obtained from your server in Getting Started.
import android.os.Bundle
import io.petnow.ui.PetnowCameraFragment
import java.util.UUID

class ClientCameraFragment : PetnowCameraFragment(), PetnowCameraDetectionListener {

  companion object {
    fun newInstance(captureSessionId: UUID) = ClientCameraFragment().apply {
      arguments = Bundle().apply {
        putString(ARG_CAPTURE_SESSION_ID, captureSessionId.toString())
      }
    }
  }

  override fun provideCustomOverlayLayout(): Int? = null

  override fun onAttach(context: Context) {
      super.onAttach(context)
      setPetnowCameraDetectionListener(this) // UI Module Detection listener setter
  }

  override fun onDetectionFinished(result: DetectionCaptureResult) {
    when (result) {
        is DetectionCaptureResult.Success -> {
            val (noseImages, faceImages) = result
        }
        is DetectionCaptureResult.Fail -> {

        }
    }
  }

  override fun onDetectionProgress(progress: Int) {

  }

  override fun onDetectionStatus(primaryDetectionStatus: PetnowDetectionStatus) {

  }
}
Fragment Usage Example
// Using ClientCameraFragment from Activity or another Fragment
val captureSessionId: UUID = // captureSessionId received from server

val fragment = ClientCameraFragment.newInstance(captureSessionId)
supportFragmentManager.beginTransaction()
    .replace(R.id.fragment_container, fragment)
    .commit()
2. Implement Detection Callbacks
onDetectionFinished
Callback that receives success/failure status and required file list after detection ends.
sealed class DetectionCaptureResult {
    data class Success(
        val noseImageFiles: List<File>,
        val faceImageFiles: List<File>
    ) : DetectionCaptureResult()

    data object Fail : DetectionCaptureResult()
}
onDetectionProgress
Callback that receives detection progress as an Int value (0-100).
onDetectionStatus
Callback that receives the status of each frame during detection.
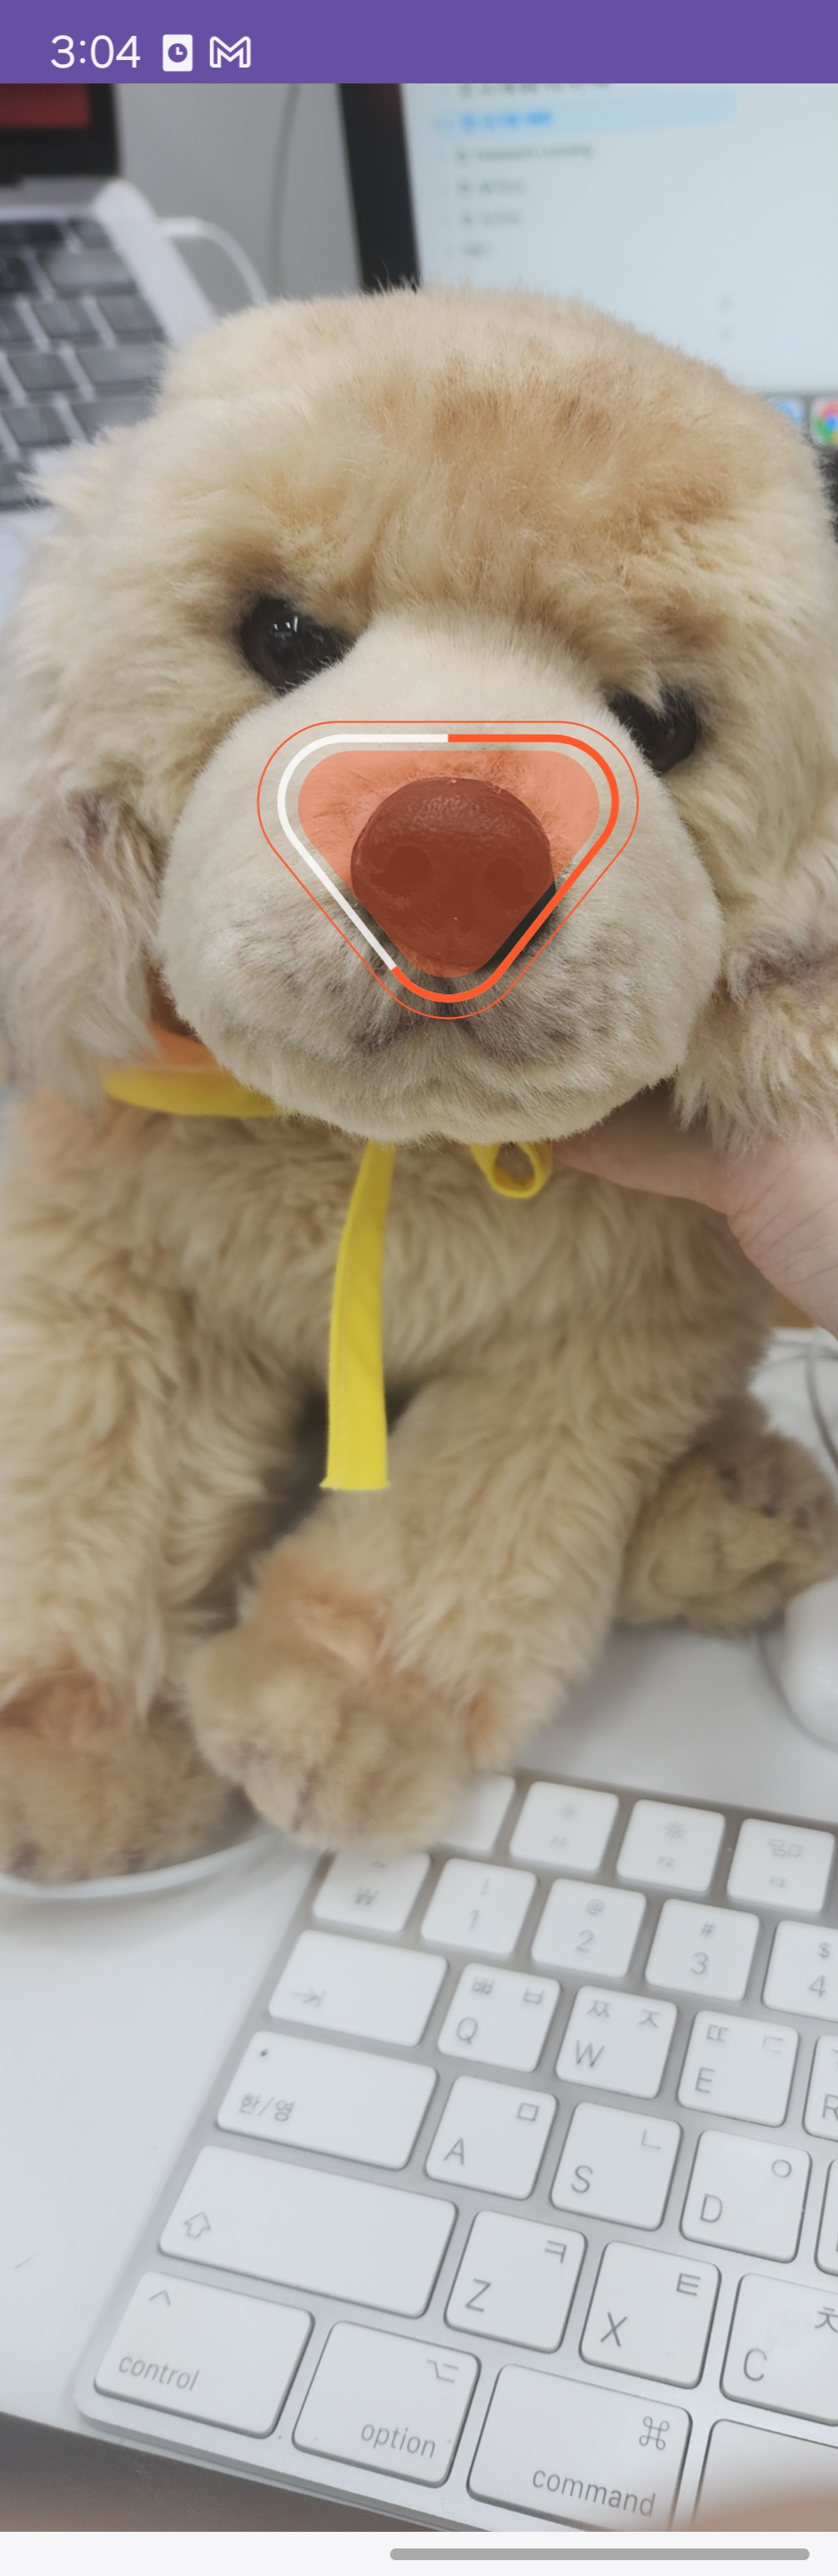
3. Basic Execution Screen
When you configure and run the fragment as shown above, the camera screen displays only the basic Tracking UI.
4. Additional Features
Front/Rear Camera Switching
You can switch between front and rear cameras. Check if the device supports a front camera before switching.
val ctx = context ?: return

// Check front camera support
if (ctx.cameraInfo.isFrontCameraSupported) {
    switchCamera()
} else {
    // Handle unsupported front camera
    Toast.makeText(ctx, "This device does not support front camera", Toast.LENGTH_SHORT).show()
}
Resume Detection
You can restart the Detection of the current session from the beginning.
resumeDetection()
    .onSuccess {
        // Detection resume successful
    }
    .onFailure { error ->
        // Handle error
        Toast.makeText(context, "Resume failed: ${error.message}", Toast.LENGTH_SHORT).show()
    }
Next Steps
Once you've learned the basic usage, refer to the following documentation:
- Customization - Customize UI overlay
- Sound Guide - Sound playback settings